Certificate Authorities
Updated on 26 Sep 2020
In the previous tutorial we found that our self signed san certificate was rejected by the browser. The reason for the rejection was that it hadn’t been signed by a trusted certificate authority. In this tutorial we’ll learn how to create a certificate authority, sign our certificate and load our https page without any errors.
Copy the openssl.cnf file to a local directory
Unless you’re comfortable making changes to the original configuration file, we’ll copy it to a local directory and make our changes there. Infact we’ll be building on the previous changes we made in an earlier tutorial, so we’ll grab that file.
cp /usr/lib/ssl/openssl.cnf localhost.cnf
Under the [ v3_ca ] section, add the following.
[ v3_ca ]
subjectKeyIdentifier=hash
authorityKeyIdentifier=keyid:always,issuer
basicConstraints = critical, CA:TRUE, pathlen:3
keyUsage = critical, cRLSign, keyCertSign
nsCertType = sslCA, emailCA
Also make sure that the changes to [ v3_req ] from before are still there, and the line req_extensions = v3_req has been uncommented.
Create RSA public/private key
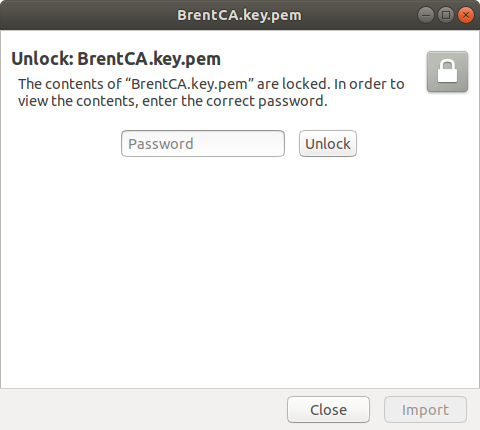
openssl genrsa -aes256 -out BrentCA.key.pem 2048
This encodes a key file using a passphrase based on AES256. We’ll use this in the next step to create a CA certificate. Some explanations.
genrsagenerates a RSA private key-aes256is the type of encryption used for the private key-outwhere to write the file2048the number of bits used for the encryption
If we double click the file that was created, we are presented with a prompt to enter a password.
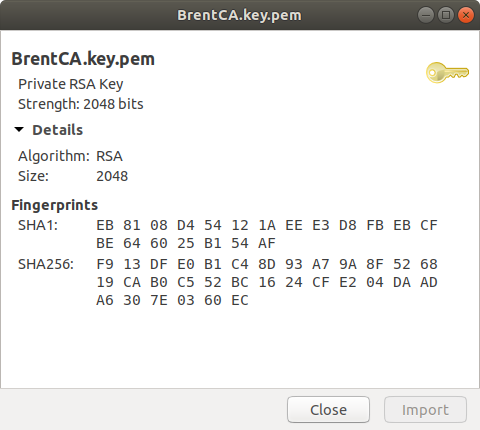
Once we’ve entered the password, we can see details of the key we created.
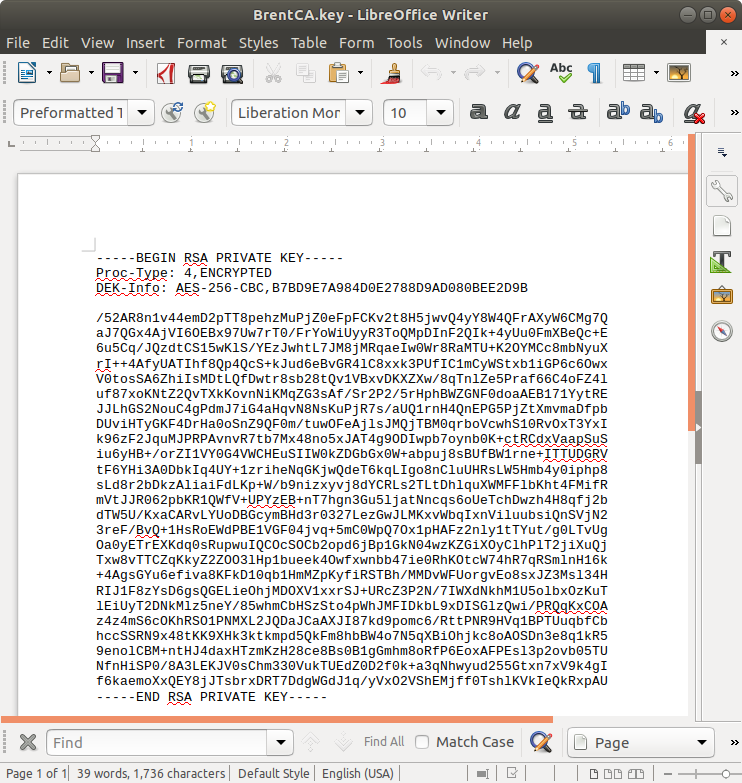
It is worth noting here that I could have run the command like this (without the .pem), and I would have got a different output when I double clicked on the file.
openssl genrsa -aes256 -out BrentCA.key 2048
Create a self-signed root CA certificate
Now we want to use the key we created at the previous step to create a CA certificate
openssl req -new -x509 -subj "/CN=BrentCA" -extensions v3_ca -days 365 -key BrentCA.key.pem -sha256 -out BrentCA.crt -config localhost.cnf
Here is an explanation to some of the commands I have used. Further information can be found on this website.
reqthe command to create and process certificate requests in PKCS#10 format. link-newthis option generates a new certificate request, and will prompt the user for the relevant field values-x509this means we are using the X.509 is public key infrastructure standard used by SSL/TLS for key and certificate management. We are using it for CSR (certificate signing request) management. Link-subjsets the subject. Must start with /CN= for this example.-extensionswhat extensions we wish to load. v3_ca because we want to create a CA certificate-dayshow long the certificate will be valid for. If not set, defaults to 30 days.-keyinput file of the private key we created in the earlier step-outoutput filename for the CA certificate.-config localhost.cnfrefers to the config file we wish to use. (created in an earlier tutorial)
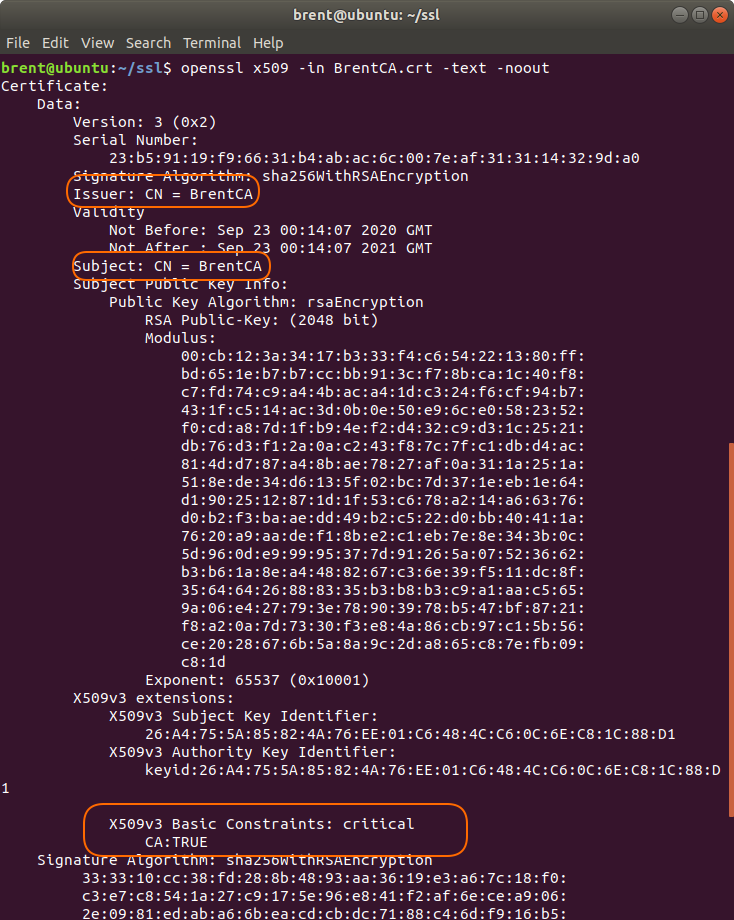
I can verify the CA certificate with this command.
openssl x509 -in BrentCA.crt -text -noout
Here is an explanation to some of the commands I have used. Further information can be found on this website.
x509use the x.509 standard. Link-inspecifies the input filename to read the certificate from-textprint the certificate out in text form.-nooutdo not print out the encoded version of the certificate
A couple of things to look out for:
IssuerandSubject. They should both have values of CN = BrentCA.- Towards the bottom of the screen shot,
X509v3 Basic Constraints:I should have CA:TRUE
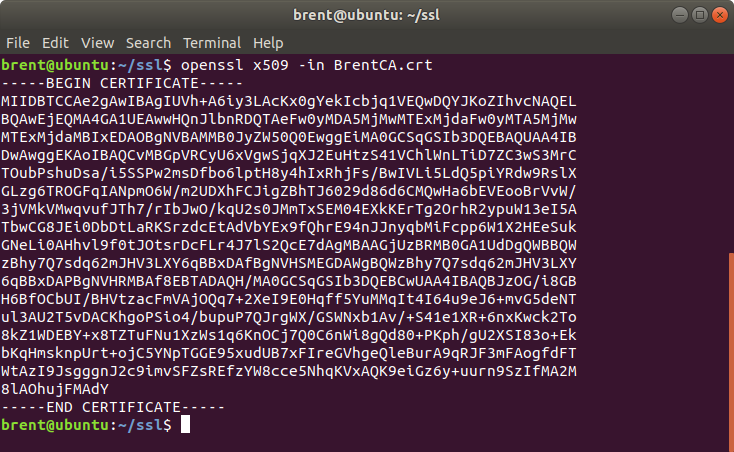
If we modified the previous command to not have -text and -noout then we’d get a very different type of output.
Create server certificate signing request (CSR)
First generate the private RSA key with the following command. Notice we are not using -aes256. That means our private key will not have a password associated with it - which is fine because we are going to be using it with Apache, and we don’t want to re-enter the password for the certificate each time Apache is restarted.
openssl genrsa -out apache-selfsigned.key 2048
genrsagenerates a RSA private key-outwhere to write the file2048the number of bits used for the encryption
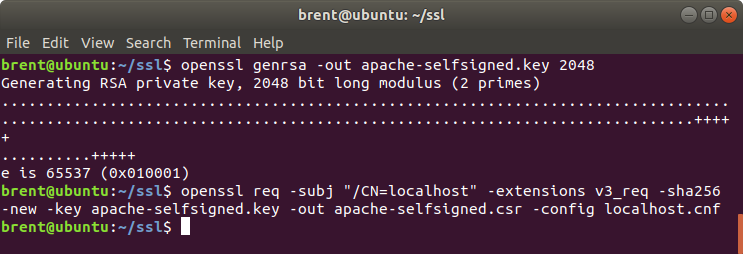
Now we can create the CSR (certificate signing request):
openssl req -subj "/CN=localhost" -extensions v3_req -sha256 -new -key apache-selfsigned.key -out apache-selfsigned.csr -config localhost.cnf
reqthe command to create and process certificate requests in PKCS#10 format. link-subjsets the subject. Must start with /CN= for this example.-extensionswhat extensions we wish to load. v3_req because need to include thesubject alternate name.-newthis option generates a new certificate request, and will prompt the user for the relevant field values-keyinput file of the private key we just created-outoutput filename for the CSR file.-config localhost.cnfrefers to the config file we wish to use. (created in an earlier tutorial)
Then generate the server certificate using the:
- server signing request (CSR file)
-in - the CA signing key
-CAkey - CA certificate
-CA
openssl x509 -req -extensions v3_req -days 365 -sha256 -in apache-selfsigned.csr -CA BrentCA.crt -CAkey BrentCA.key.pem -CAcreateserial -out apache-selfsigned.crt -extfile localhost.cnf
Some of the new flags we have used in this command are:
-CAthe CA certificate used for signing-CAkeythe CA private key to sign the request with-CAcreateseriala CA serial number file is created if it does not exist-extfilea file containing the server certificate extensions to use. Similar to using-configfor the req command. We are using the same file.

Examine your certificate
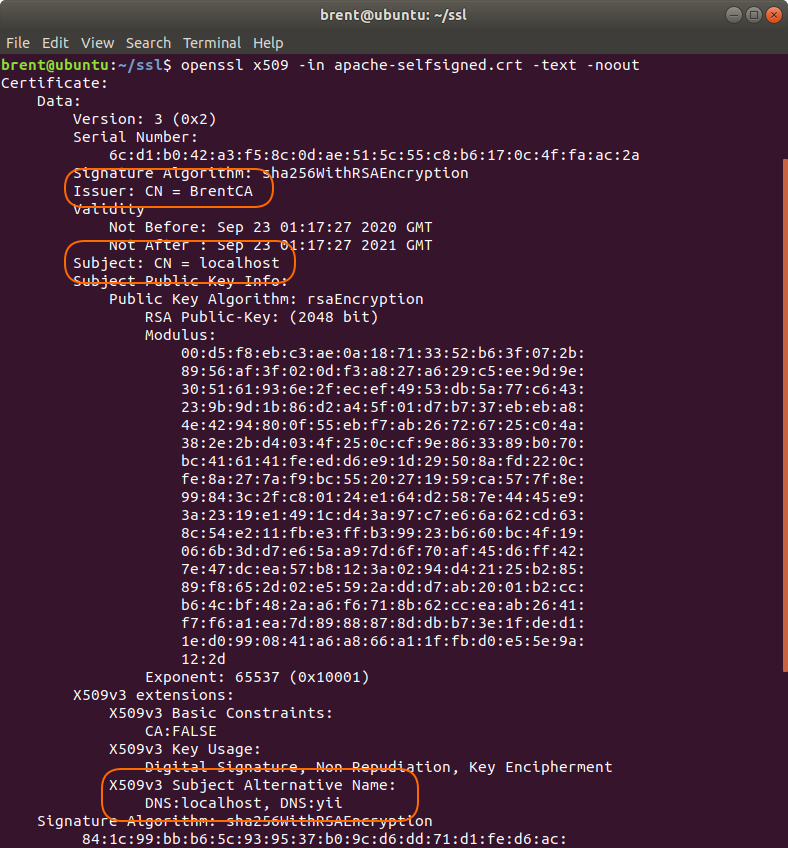
You can verify the certificate with the following command:
openssl x509 -in apache-selfsigned.crt -text -noout
x509use the x.509 standard. Link-inspecifies the input filename to read the certificate from-textprint the certificate out in text form.-nooutdo not print out the encoded version of the certificate
Some other things we can look out for in the output includes:
- We can still verify the
Subject Alternative Namesfields are set, and are the same as the earlier tutorial - Issuer has a of
CN = BrentCA
Copy files and load CA into Browser
Copy the newly created files to the correct directories.
sudo cp apache-selfsigned.key /etc/ssl/private/
sudo cp apache-selfsigned.crt /etc/ssl/certs/
Important, since we are putting in new certificates, make sure to restart apache so the changes can take effect. Also might be worth checking that Apache is referring to the correct certificates as well.
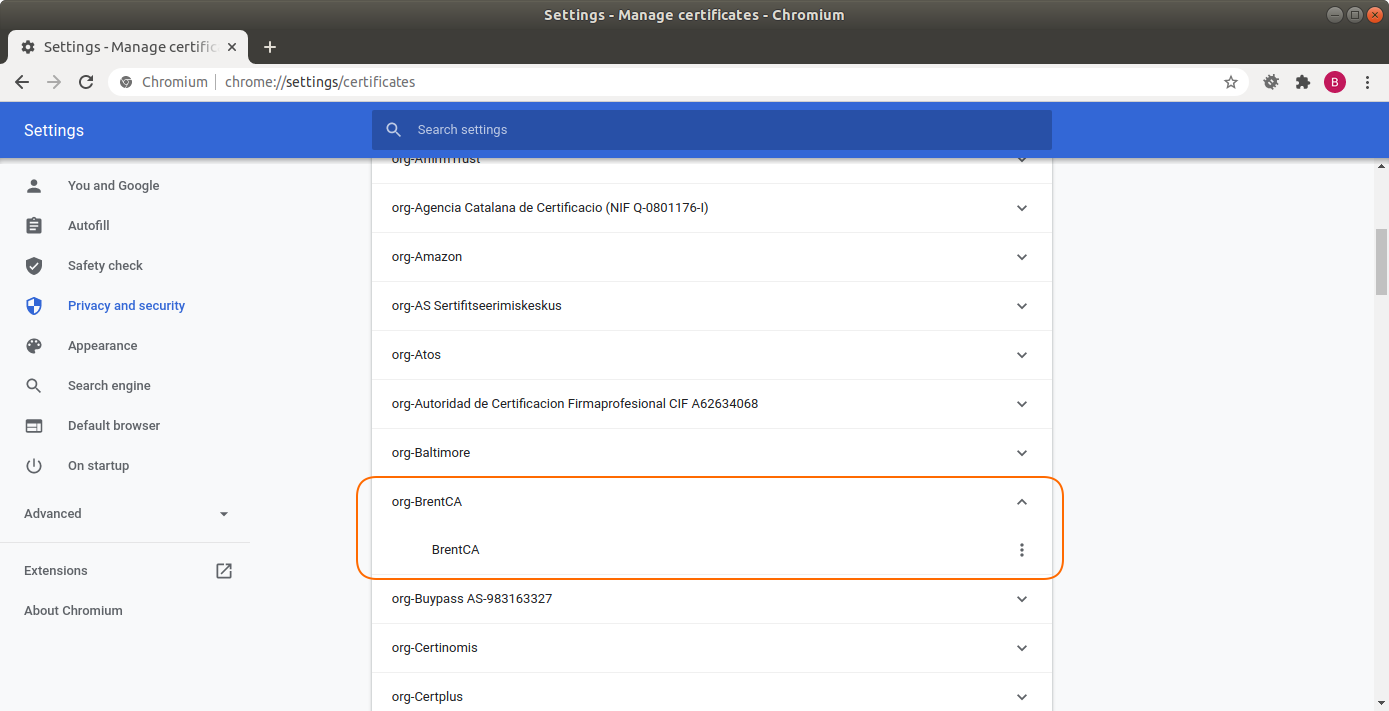
In Chrome, choose the menu option settings, click Privacy and Security on the left panel and choose Security from the main page.
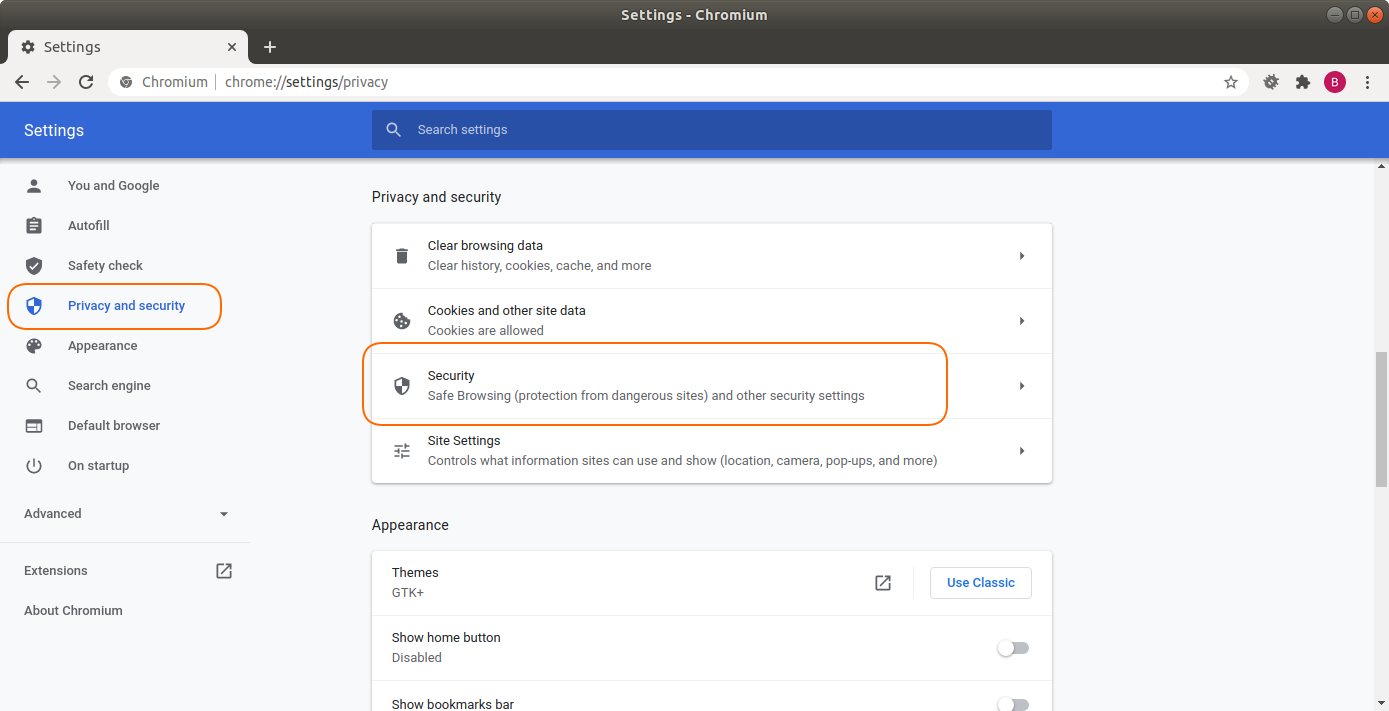
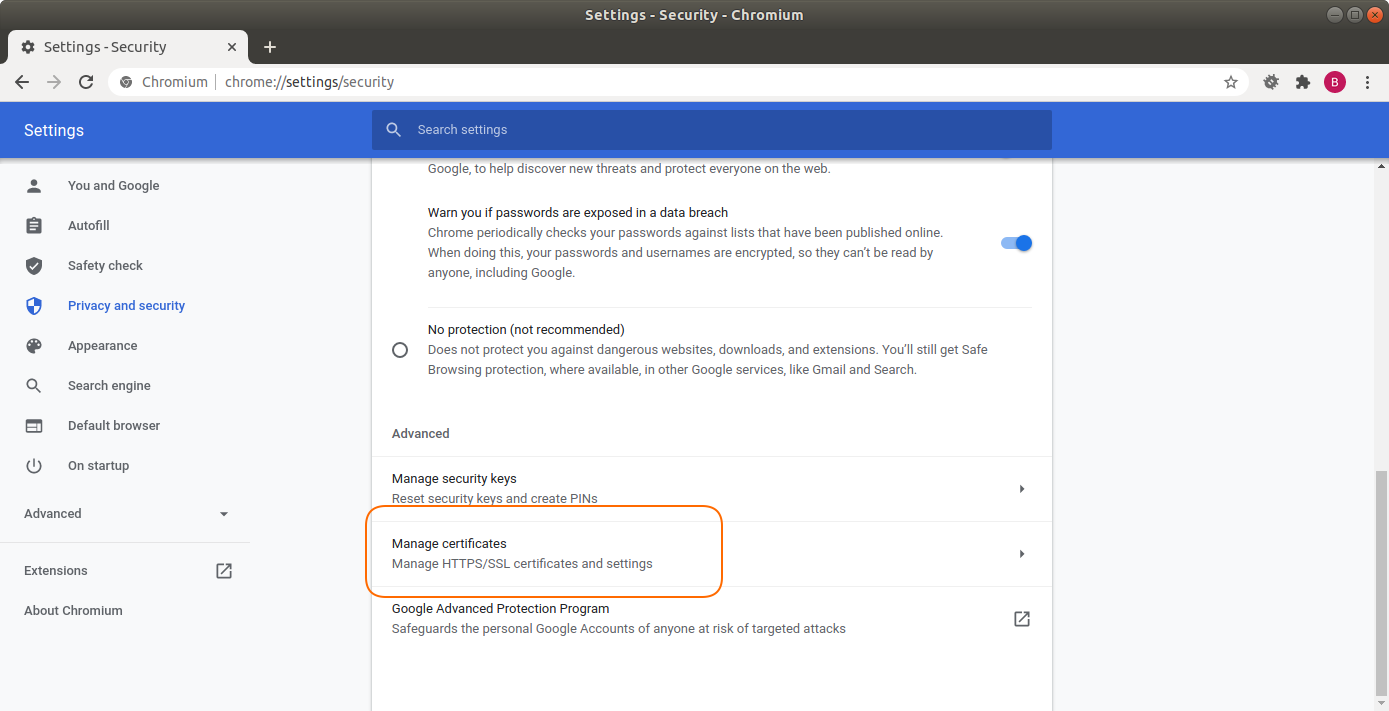
Scroll down and choose Manage certificates.
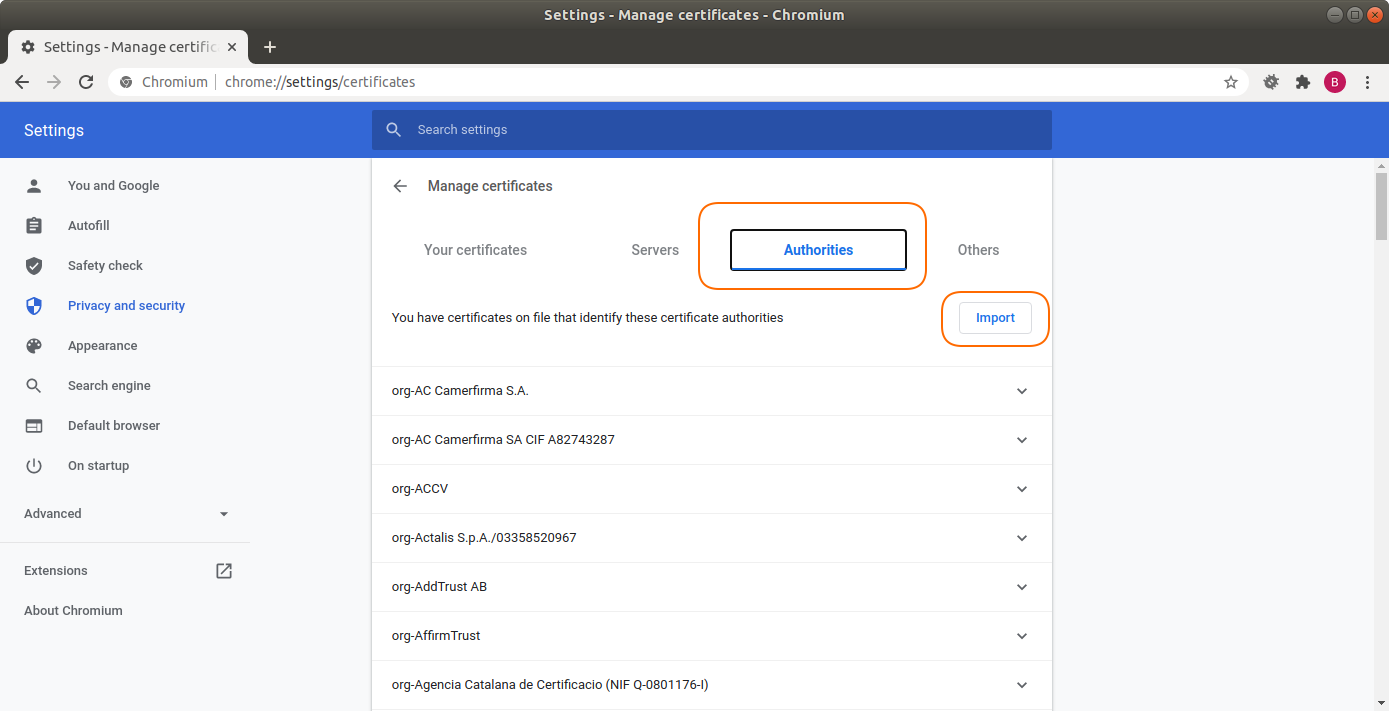
Choose the Authorities tab, and click the Import button.
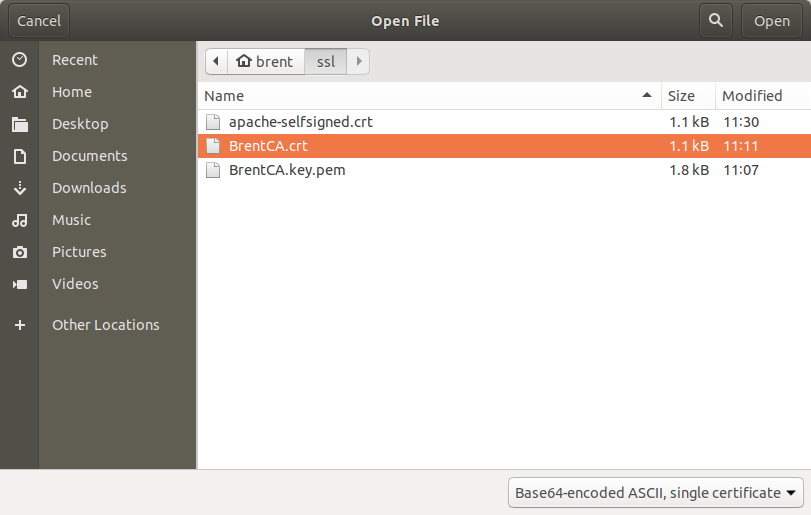
Choose the BrentCA.crt file that we created in step 3.
Make sure you at least check the first box (so that CA is valid for websites)

After all is done, we should see our CA in the list of trusted authorities.
test it out
Make sure that we have restarted apache to ensure that our changes (the new ssl certs that were signed by a CA) will take effect.
sudo systemctl restart apache2
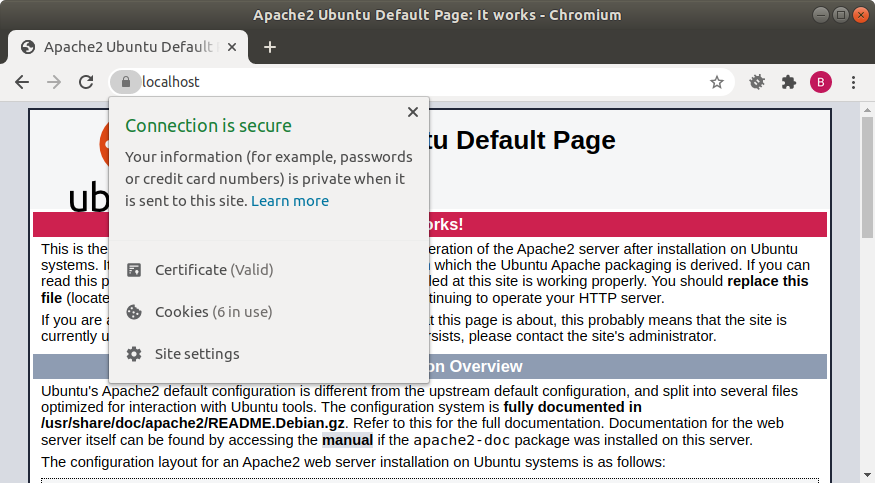
Now when we go to https://localhost, we get a much better response.